
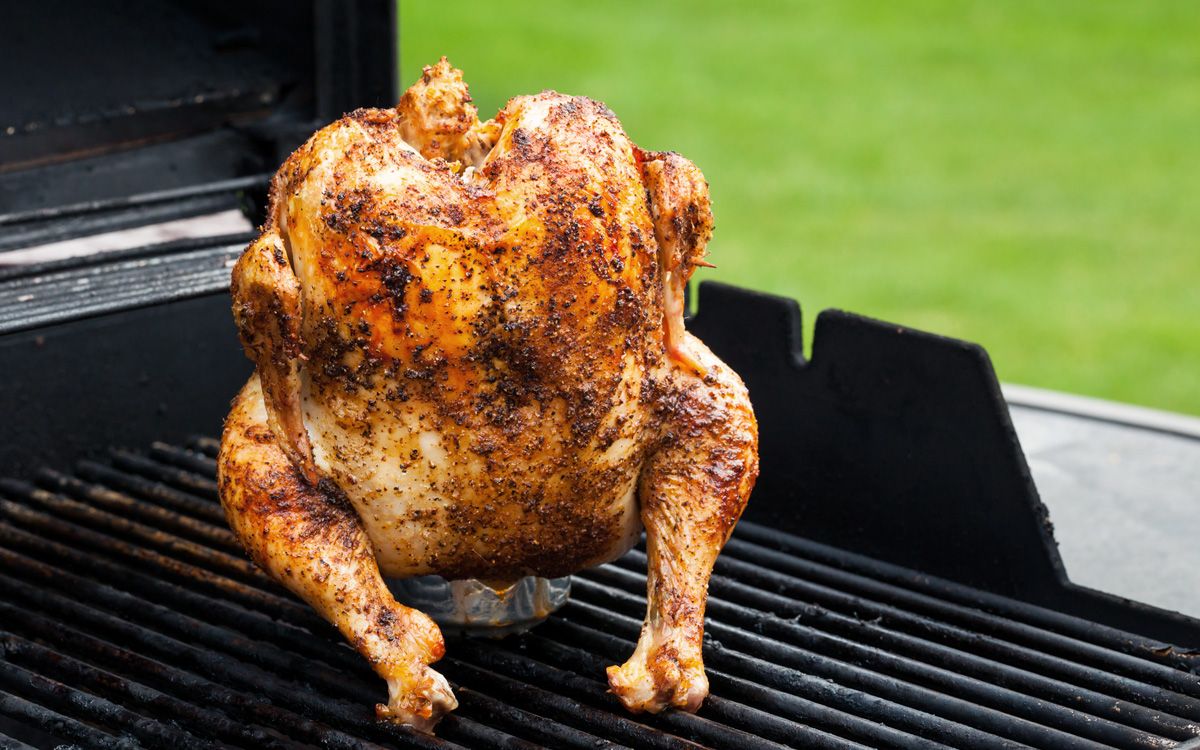
Beer can chicken is a fun and flavorful way to cook a whole chicken. The method involves placing the chicken on top of a partially filled can of beer, which helps to keep the chicken moist and infuses it with a subtle beer flavor. This recipe is perfect for a summer barbecue or a casual family dinner.
Most of the ingredients in this recipe are common pantry staples, but you might need to pick up a whole chicken and a can of beer if you don't already have them. The spices like paprika, garlic powder, and onion powder are also essential for seasoning the chicken, so make sure you have those on hand.
Ingredients For Beer Can Chicken Recipe
Beer: Adds moisture and a subtle flavor to the chicken.
Chicken: The main protein for the dish, preferably a whole chicken around 4 pounds.
Olive oil: Used to rub the chicken and help the spices adhere.
Paprika: Adds a smoky flavor and vibrant color to the chicken.
Salt: Enhances the overall flavor of the chicken.
Black pepper: Adds a bit of heat and depth to the seasoning.
Garlic powder: Provides a rich, garlicky flavor to the chicken.
Onion powder: Adds a subtle sweetness and depth of flavor to the chicken.
Technique Tip for This Recipe
When preparing the beer can chicken, ensure that the beer can is only about three-quarters full. This allows the beer to steam and infuse the chicken with flavor without overflowing. Additionally, use a meat thermometer to check the internal temperature of the chicken to ensure it reaches 165°F (75°C) for safe consumption.
Suggested Side Dishes
Alternative Ingredients
beer - Substitute with non-alcoholic beer: Provides a similar flavor profile without the alcohol content.
beer - Substitute with vegetable broth: Adds moisture and flavor without using alcohol.
chicken - Substitute with whole cauliflower: A large cauliflower can be seasoned and roasted similarly to a chicken, making it a great vegan alternative.
olive oil - Substitute with coconut oil: Provides a similar fat content and helps in roasting, with a slightly different flavor.
paprika - Substitute with smoked paprika: Adds a smoky flavor that complements the roasted cauliflower.
salt - Substitute with sea salt: Provides the same seasoning effect with a slightly different mineral content.
black pepper - Substitute with white pepper: Offers a milder peppery flavor that can be a subtle alternative.
garlic powder - Substitute with fresh minced garlic: Adds a more robust garlic flavor and aroma.
onion powder - Substitute with finely chopped onions: Provides a fresh onion flavor and texture.
Other Alternative Recipes
How to Store or Freeze This Dish
- Allow the chicken to cool completely before storing. This helps prevent condensation, which can lead to sogginess and spoilage.
- Once cooled, carve the chicken into smaller pieces. This makes it easier to store and reheat later.
- Place the chicken pieces in an airtight container or wrap them tightly in aluminum foil or plastic wrap. Make sure to remove as much air as possible to maintain freshness.
- Label the container with the date to keep track of how long it has been stored.
- Store the chicken in the refrigerator if you plan to consume it within 3-4 days. For longer storage, place it in the freezer.
- When freezing, consider using a vacuum sealer for optimal freshness. If you don't have one, double-wrap the chicken in plastic wrap and then place it in a freezer-safe bag.
- To reheat, thaw frozen chicken in the refrigerator overnight. Reheat in the oven at 350°F (175°C) until warmed through, or use a microwave for quicker results.
- For added flavor, brush the chicken with a bit of olive oil or your favorite sauce before reheating. This helps to keep the meat moist and enhances its taste.
- If you have leftover beer from the recipe, consider using it to make a flavorful marinade or sauce for your next meal.
How to Reheat Leftovers
Oven Method:
- Preheat your oven to 350°F (175°C).
- Place the leftover chicken in an oven-safe dish.
- Cover the dish with aluminum foil to keep the chicken moist.
- Heat for about 20-25 minutes, or until the internal temperature reaches 165°F (75°C).
- Remove the foil for the last 5 minutes to crisp up the skin.
Microwave Method:
- Place the chicken pieces on a microwave-safe plate.
- Cover with a microwave-safe lid or another plate to retain moisture.
- Heat on medium power for 2-3 minutes.
- Check the temperature and continue heating in 30-second intervals until the chicken is thoroughly heated.
Stovetop Method:
- Heat a skillet over medium heat and add a splash of olive oil or chicken broth.
- Place the chicken pieces in the skillet.
- Cover the skillet with a lid to trap steam and heat evenly.
- Cook for about 5-7 minutes, flipping occasionally, until the chicken is heated through.
Air Fryer Method:
- Preheat your air fryer to 350°F (175°C).
- Place the chicken pieces in the air fryer basket in a single layer.
- Heat for 5-7 minutes, checking halfway through to ensure even heating.
- Continue until the chicken reaches an internal temperature of 165°F (75°C).
Sous Vide Method:
- Preheat your sous vide machine to 140°F (60°C).
- Place the chicken in a vacuum-sealed bag or a ziplock bag using the water displacement method.
- Submerge the bag in the water bath and heat for about 45 minutes.
- Remove from the bag and, if desired, sear in a hot skillet for 1-2 minutes to crisp up the skin.
Best Tools for This Recipe
Grill: Used to cook the chicken by providing consistent heat.
Tongs: Essential for handling the chicken and beer can safely.
Meat thermometer: Necessary to check the internal temperature of the chicken to ensure it is fully cooked.
Basting brush: Used to apply olive oil and seasoning evenly on the chicken.
Can opener: Useful for opening the beer can if it is not a pull-tab.
Measuring spoons: Needed to measure out the paprika, salt, black pepper, garlic powder, and onion powder accurately.
Small bowl: Handy for mixing the olive oil and seasonings together before applying to the chicken.
Paper towels: Useful for patting the chicken dry before applying the olive oil and seasonings.
Grill gloves: Important for handling hot items safely when removing the chicken from the grill.
Carving knife: Used to carve the chicken once it has rested after cooking.
Cutting board: Provides a stable surface for carving the chicken.
How to Save Time on This Recipe
Pre-mix the spices: Combine paprika, salt, black pepper, garlic powder, and onion powder in advance to save time during preparation.
Use a beer can holder: Invest in a beer can chicken holder to ensure the chicken stands upright easily and cooks evenly.
Preheat the grill: Start preheating your grill while you prepare the chicken to reduce overall cooking time.
Marinate overnight: Rub the chicken with olive oil and spices the night before to enhance flavor and save time on the day of cooking.
Beer Can Chicken Recipe
Ingredients
Main Ingredients
- 1 can Beer 12 oz
- 1 whole Chicken about 4 pounds
- 2 tablespoon Olive Oil
- 1 tablespoon Paprika
- 1 teaspoon Salt
- 1 teaspoon Black Pepper
- 1 teaspoon Garlic Powder
- 1 teaspoon Onion Powder
Instructions
- Preheat your grill to medium-high heat.
- Rub the chicken with olive oil, then season with paprika, salt, black pepper, garlic powder, and onion powder.
- Open the beer can and take a few sips (or pour out about ¼ of the beer). Place the beer can in the center of the grill.
- Place the chicken on top of the beer can, balancing it so it stands upright.
- Close the grill lid and cook for about 90 minutes, or until the internal temperature of the chicken reaches 165°F (75°C).
- Carefully remove the chicken from the grill and let it rest for 10 minutes before carving.
Nutritional Value
Keywords
Suggested Appetizers and Desserts
More Amazing Recipes to Try 🙂
- Banh Mi Recipe30 Minutes
- Marshmallow Treats Recipe20 Minutes
- Napa Cabbage Salad Recipe15 Minutes
- BBQ Chicken Breasts Recipe35 Minutes
- Sourdough Starter Recipe72 Hours
- Chicken Parmesan Recipe45 Minutes
- Traditional Welsh Rarebit Recipe25 Minutes
- Chicken and Noodles Recipe45 Minutes
Leave a Reply